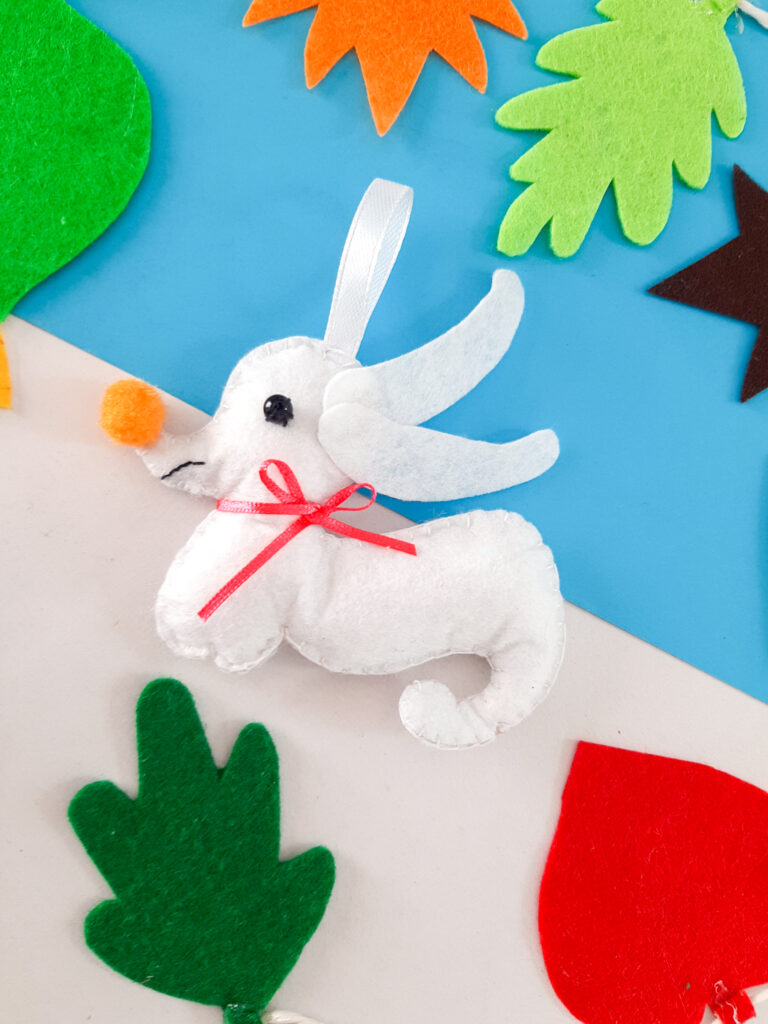
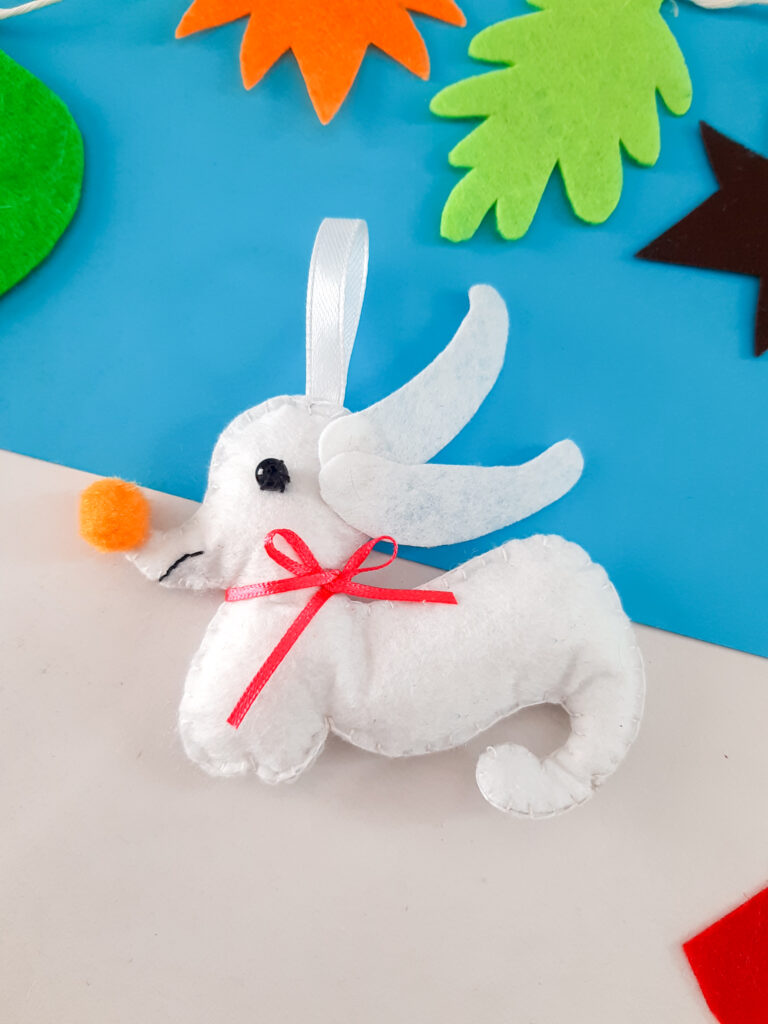
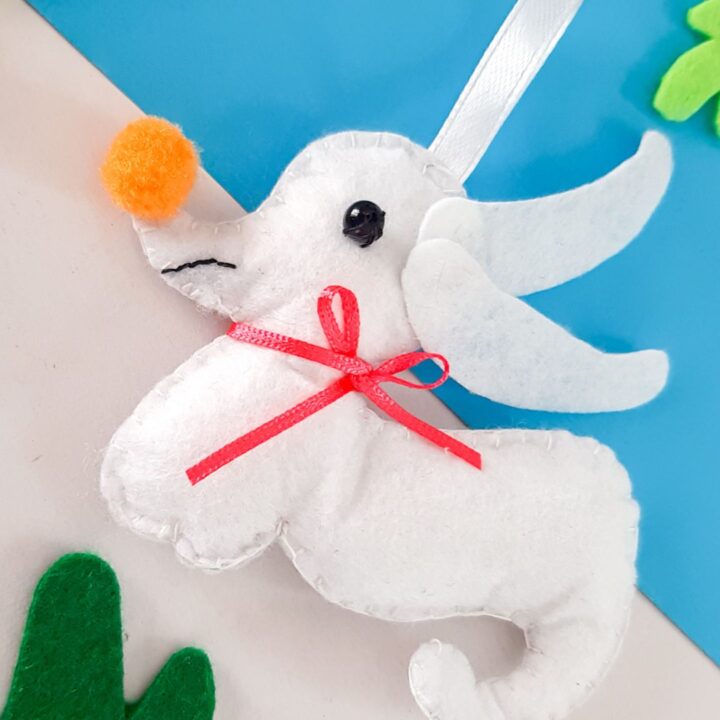
A few weeks ago I shared a DIY Oogie Boogie ornament, but we all know Zero is the cutest part of The Nightmare Before Christmas! He’s even cuter in felt ornament form, and he’s pretty easy to make, too!
If you’re looking to make some DIY Halloween decorations- or to add some adorable DIY Christmas ornaments to your holiday decorations- this DIY Zero felt ornament is perfect! It’s not super hard to make and I’ve included no-sew directions too if you aren’t into sewing or your kids want to make this with you!
How can you use this DIY Zero the Dog Ornament?
Like any ornament, you can hang this on a Christmas tree {or Halloween tree if you have one!}. But you can also hang it from a wreath or even leave off the ribbon to use as an adorable toy for kids {just keep in mind it’s a choking hazard for kids under 3}.
Do you have to sew to make this felt craft?
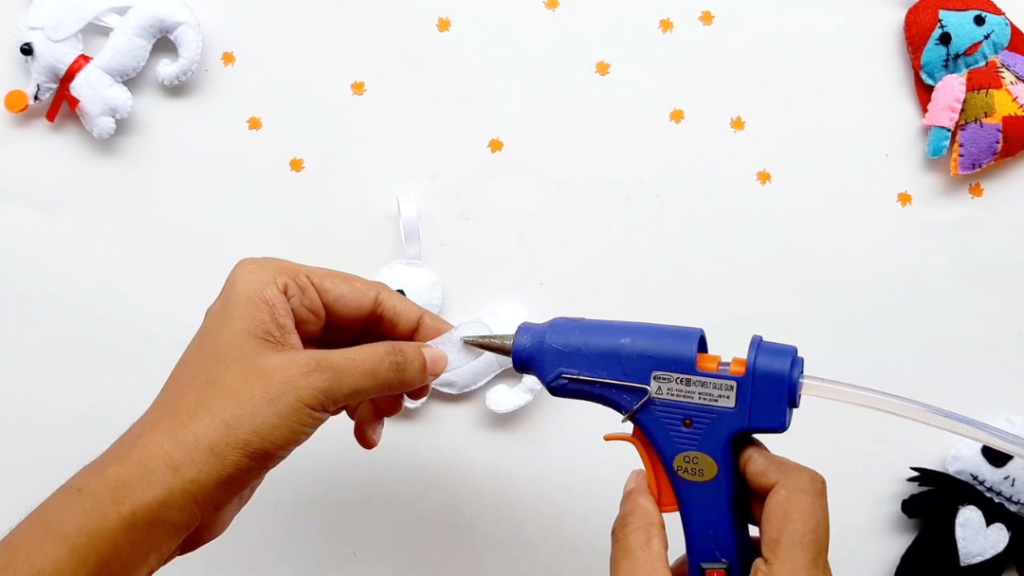
No! You can use hot glue to stick the pieces together instead of sewing them if that’s easier for you. This is a great way to make it easier for kids to make it too, just be sure to help them with the hot glue gun depending on their age!
Can you make other The Nightmare Before Christmas ornaments?
If you haven’t already made them, check out this Oogie Boogie felt ornament and this Jack Skellington bauble!

What Supplies Do You Need to Make the Felt Stuffed Zero Dog Ornament?
To make Zero out of felt, you’ll need:
{You can buy these items in much smaller quantities at your local craft store, but for ease of purchase I’ve included links below. These links are affiliate links, which means I may make a small commission on your purchase at no extra cost to you. Thanks for your support!}
- White craft felt
- Black bead or button
- Orange mini pom-pom
- White ribbon
- Thin red ribbon
- White and black embroidery floss
- Poly-fil stuffing
- Embroidery needle
- Scissors
- Hot glue gun
- Free downloadable PDF available here

Step by Step Guide
Ready to make it? Grab the printable instructions at the bottom of this post and come back here to get started!


Want more?
Want more spooky Halloween craft ideas? Try these:
- DIY Jack Skellington Ornament
- Farmhouse Style Pumpkins
- No Carve Pumpkin Decorating Ideas
- DIY Jack in the Box Costume
- DIY Spooky Halloween Lamps- in One Minute!
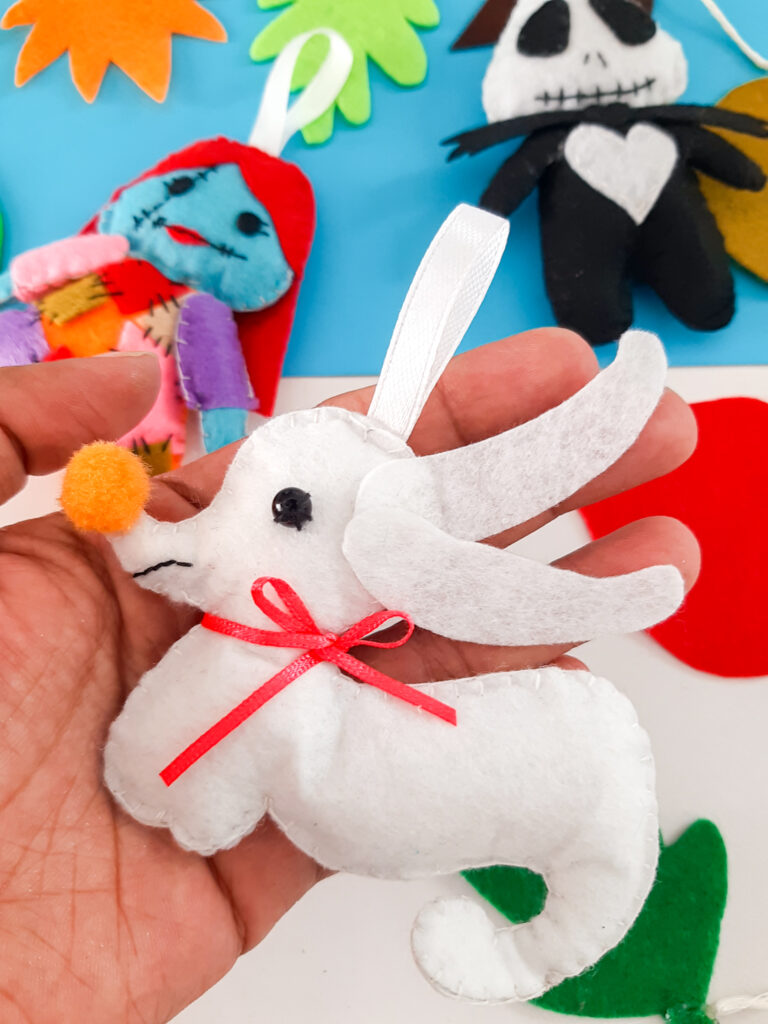
DIY The Nightmare Before Christmas Zero Felt Ornament
This easy DIY Nightmare Before Christmas ornament features Zero the Ghost Dog and is absolutely adorable! Made out of felt and using the included free printable, this ornament can be used for wreaths, Christmas trees, or anything you want and includes no sew directions!
Materials
- Craft felt, white
- Bead or button, black
- Mini Pom Pom, orange
- Ribbon, white for hanging and thin red for neck
- Embroidery floss, white and black
- Poly-fil Stuffing
- Embroidery needle
- Scissors
- Hot glue gun
Instructions
PREPARATION
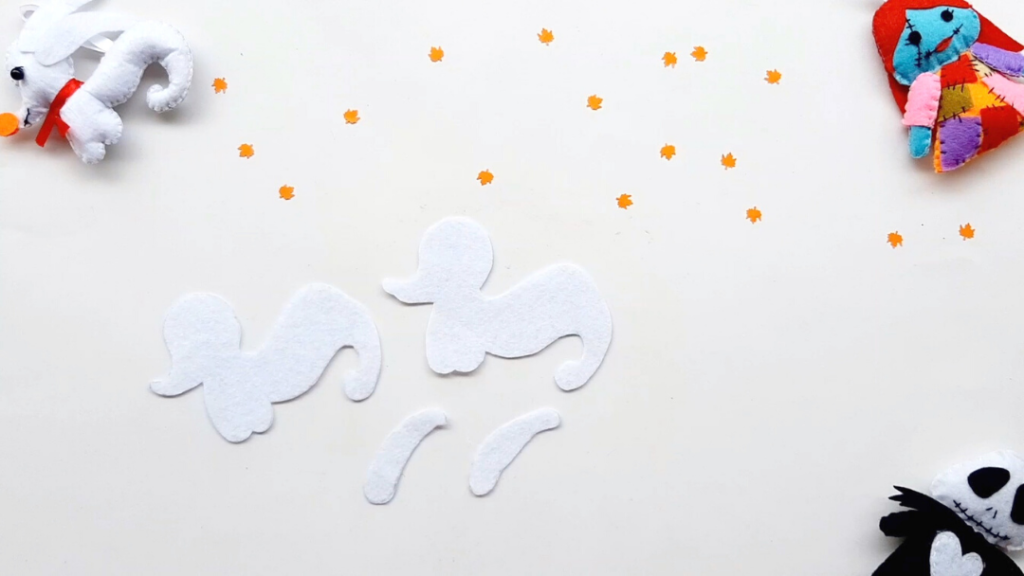
1. Print Zero pattern pieces on heavy card stock paper.
2. Cut out each piece. Use them as templates to trace and cut out the appropriate color felt pieces as noted.
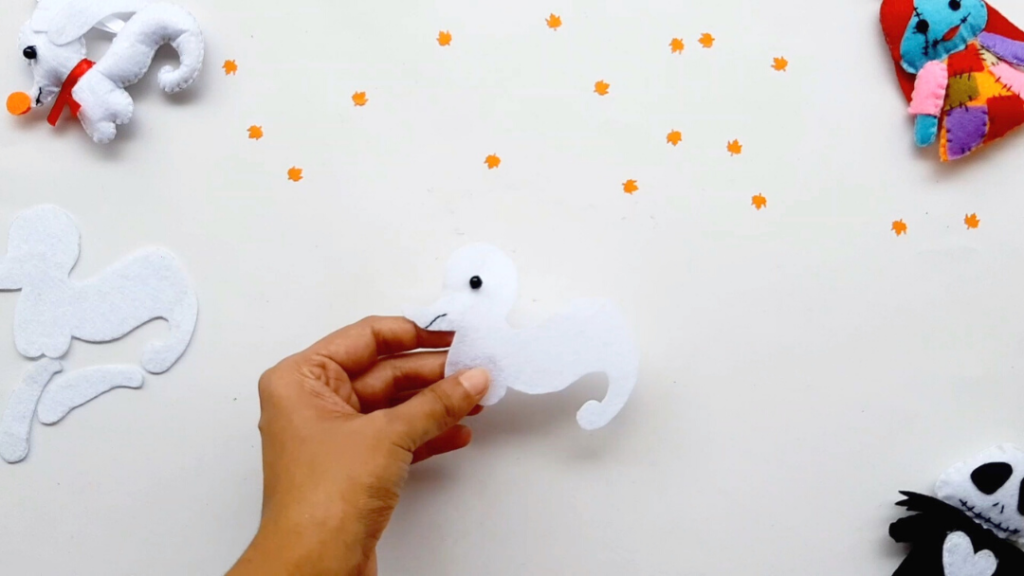
SEW THE FACE
1. Sew the mouth using black thread and attach the eye to one body piece.
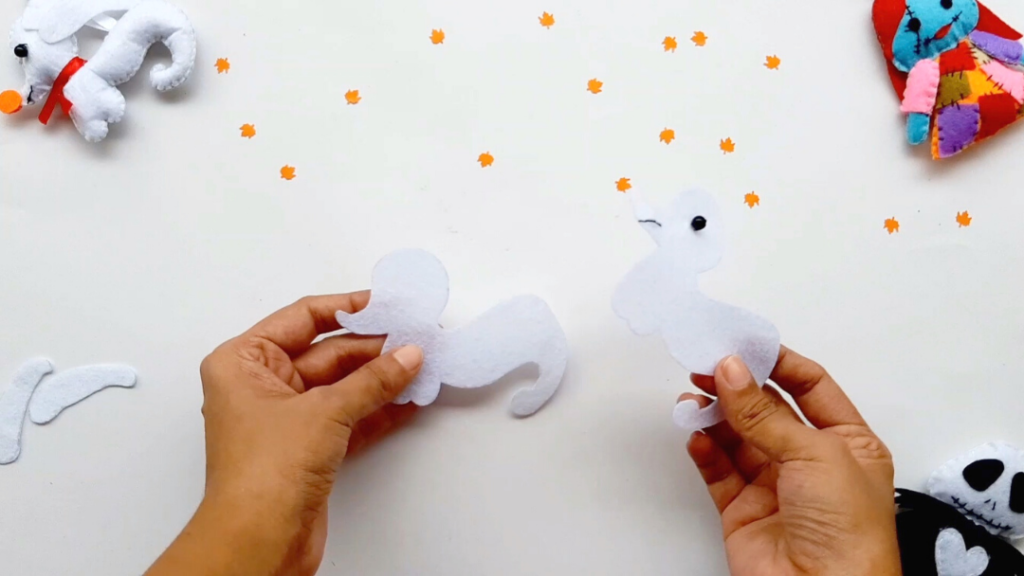
MAKE THE BODY
1. Begin sewing the two body pieces together using a blanket stitch. I recommend starting at the armpit of the front legs and going towards the tail, across the belly.
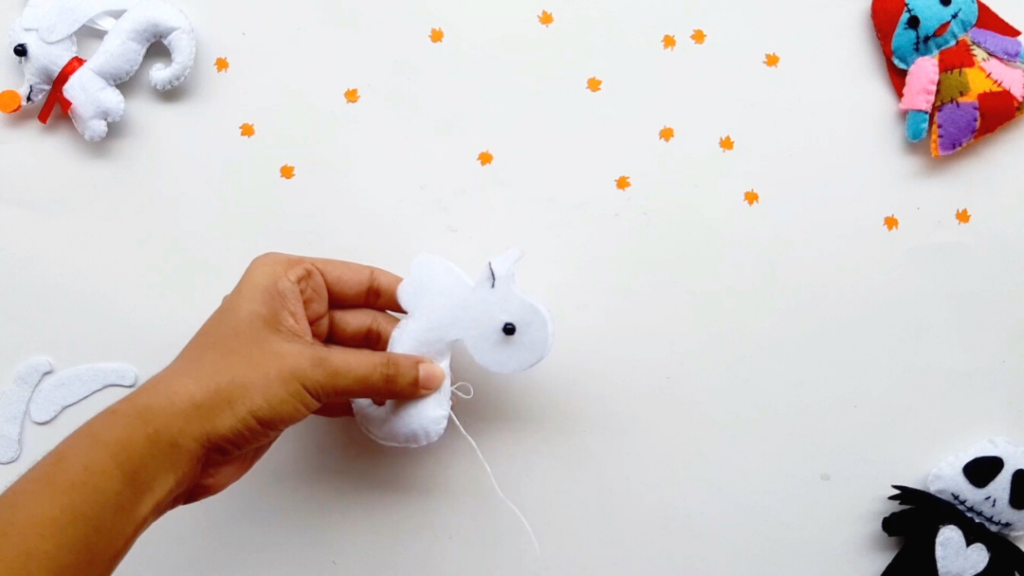
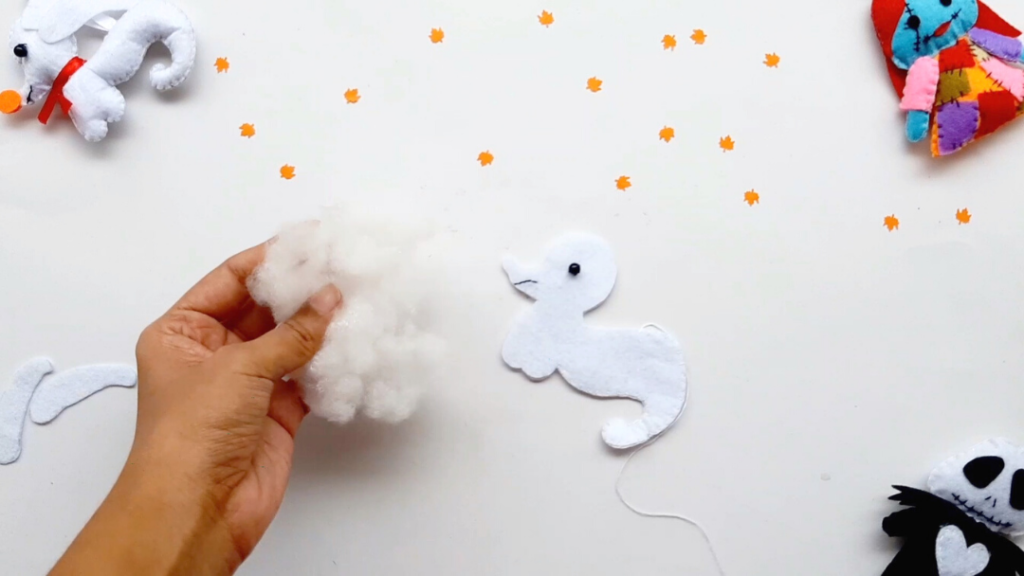
2. Sew around the tail and just above the rear before pausing stuff the tail and belly.
3. Continue sewing to the top of the head.
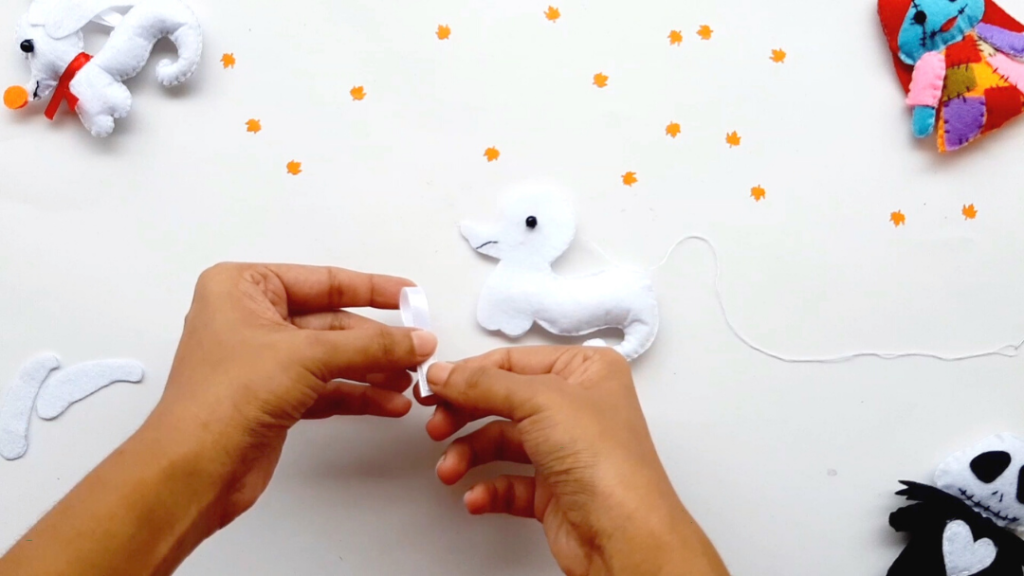
4. Fold your hanging ribbon in half and insert the raw edges into the top of the head and then continue sewing around. Pause and stuff often.
5. When you get back to where you started, finish off.
ADD THE FINISHES
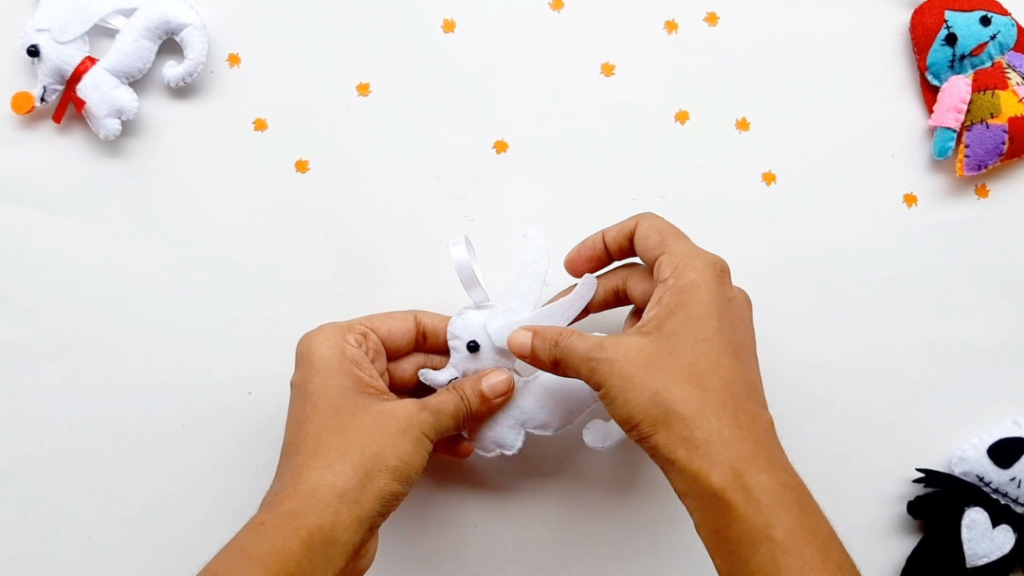
Glue on the ears and pom pom nose. Tie a thin red ribbon around his neck.
Notes
For young crafters, you can also make this a no sew project simply by using glue for everything in place of stitches! Use a permanent marker or fabric paint for the mouth and eye.
STITCHES USED
Back Stitch (for mouth)
Blanket Stitch (used around the outside edge while joining two pieces together)

Leave a Reply