One of my favorite things about fall is decorating the house. Whether I’m decorating with harvest and autumn themed decorations in September or spooky Halloween decorations in October, it’s fun to switch up the house decor a bit and make it feel a little bit more festive.
Love this? You might also like these easy Yarn Pumpkins!
While I’ve collected quite a few store-bought decorations over the years, some of my favorite decor items are handmade. Some of them I’ve purchased from small businesses, some of them were made by my kids at school, and some of them I made!
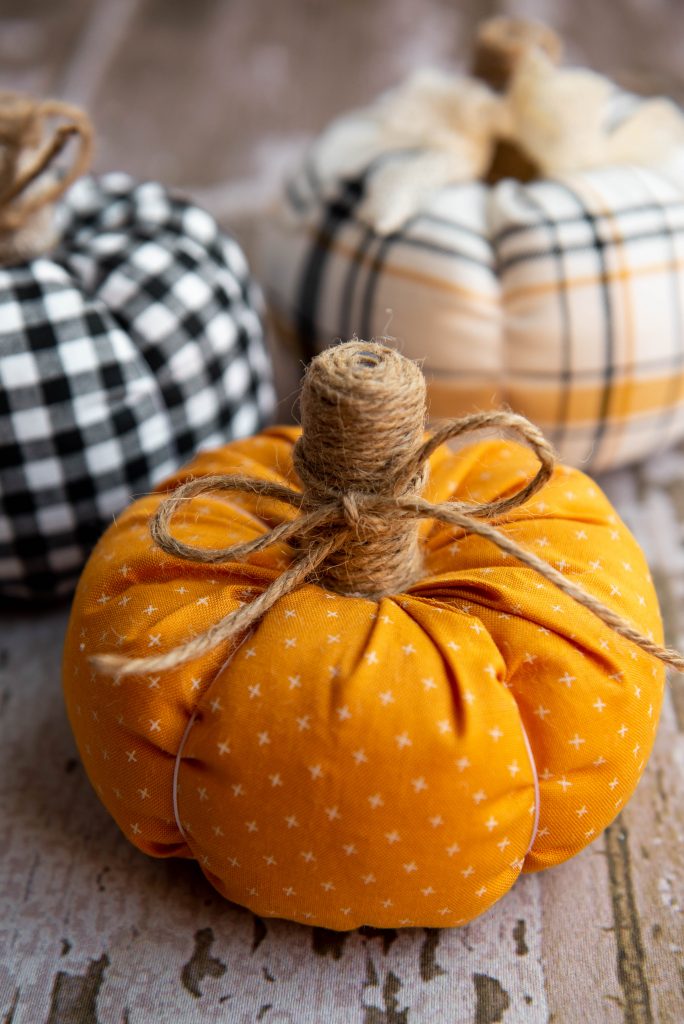
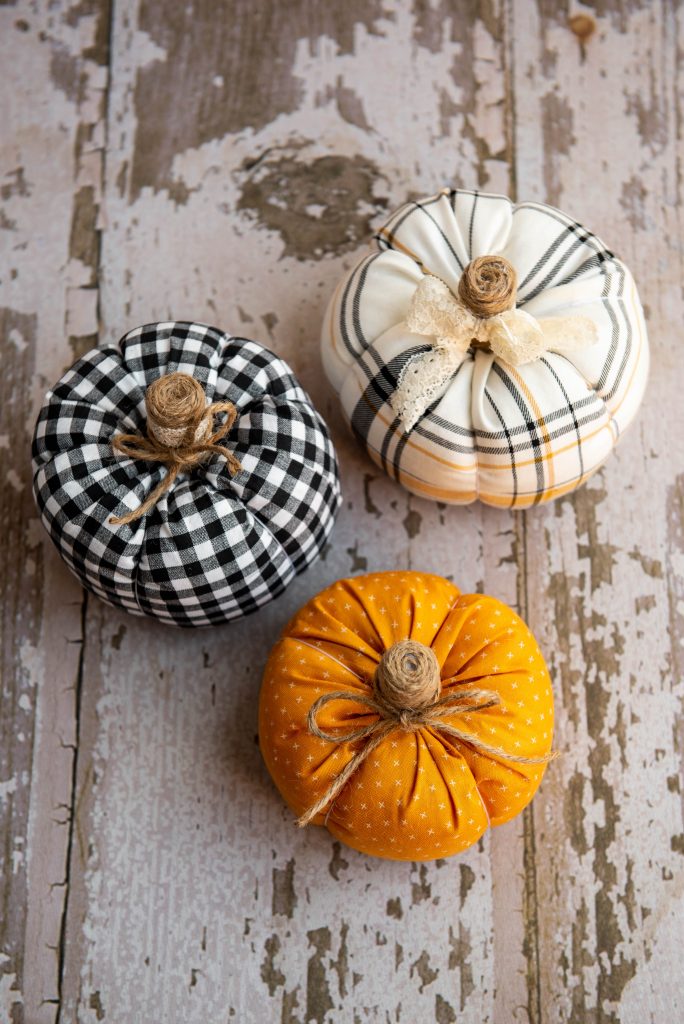
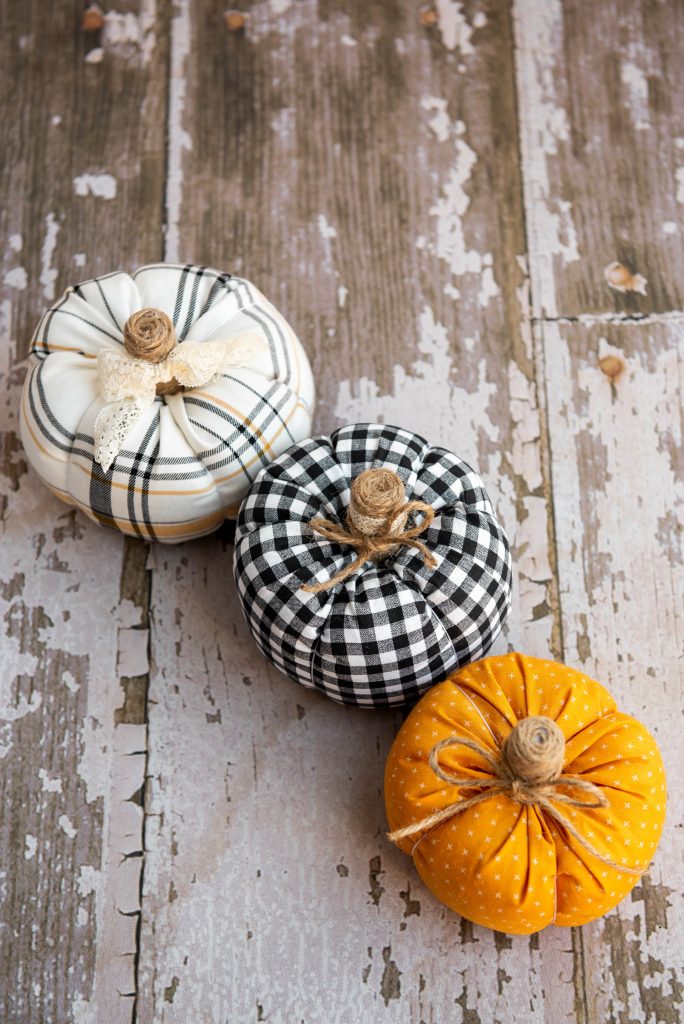
These adorable fabric pumpkins are so great because they’re easy to make, they can be placed anywhere, and they go with both fall and Halloween decorations, so you can leave them up all season long. They’re durable enough to last year after year, and you can customize them to your preferences by using different fabrics. Talk about a win-win-win-win!
Do you need a sewing machine to make these Farmhouse Fabric Pumpkins?
No! While some sewing supplies are necessary, and you’ll need to do a little bit of hand threading, there is no need for a sewing machine for this project.
How much fabric will I need to make fabric pumpkins?
The pumpkins pictured were made with 1/4 yard of fabric each. You could easily add pumpkins in bigger or smaller sizes by using bigger or smaller amounts of fabric.
Can the Kids Help?
Totally depends on your child’s age and how much you trust them with a hot glue gun and a needed. In our house this was a grown-up craft, but my kids are on the younger side.
If your kids are young too but you want to get them involved, let them help pick out the fabric and ribbon or lace! They could also help with stuffing the pumpkins, as long as you are there to guide them on how much to fill it with.
If you’re looking for a project that the kids can really get involved with, check out these DIY Yarn Pumpkins!
What Supplies Do You Need to Make Farmhouse Fabric Pumpkins?
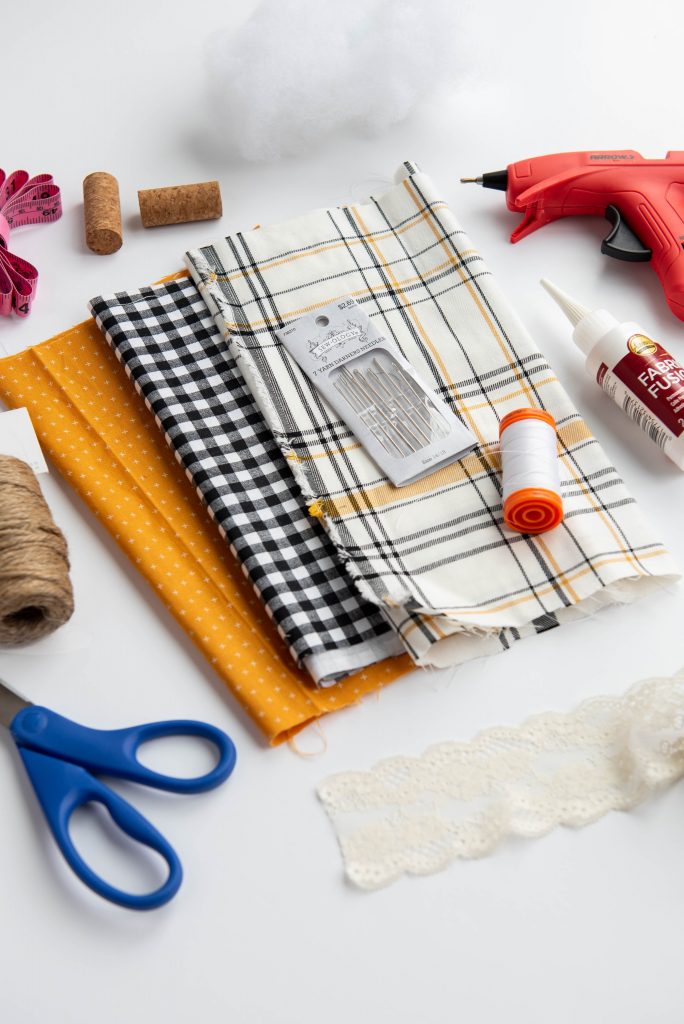
To make these fabric pumpkins, you’ll need:
{These links are affiliate links, which means I may make a small commission on your purchase at no extra cost to you. Thanks for your support!}
- Fabric of choice
- Embroidery Thread
- Hand Sewing Needles
- Fabric Fusion
- Corks
- Hot Glue Gun {and Glue Sticks}
- Scissors
- Bag of Poly Fil
- Twine
- Ribbon or Lace of choice
- Seamstress Measuring Tape
Step By Step Photo Tutorial
Now you’re ready to make the pumpkins! Get the instructions down below {they’re printable!} and follow along via the video above or these photos. If you have any questions just leave them in the comments!
Looking for More Craft Ideas?
Want more fun fall crafts? Try these:
- Yarn Pumpkins
- Pumpkin Garland
- Nightmare Before Christmas Ornament
- Harry Potter Inspired Bath Soak
- Witches Brew Bottles
- No Carve Pumpkins
- Glow in the Dark No Carve Pumpkins
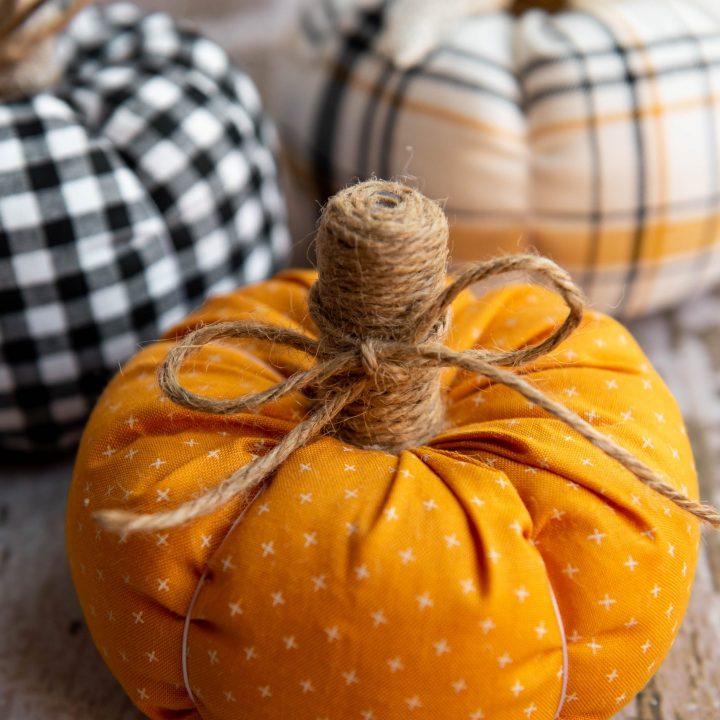
Farmhouse Style Fabric Pumpkins
These adorable Farmhouse Style Fabric Pumpkins are so cute and can easily be customized to fit your home decor!
Materials
- 1/4 yard fabric (color of pattern of choice)
- Embroidery thread
- Hand sewing needles
- Fabric fusion
- Corks
- Hot glue gun and glue sticks
- Scissors
- Bag of poly fill
- Twine
- Ribbon or lace
- Seamstress measuring tape
Notes
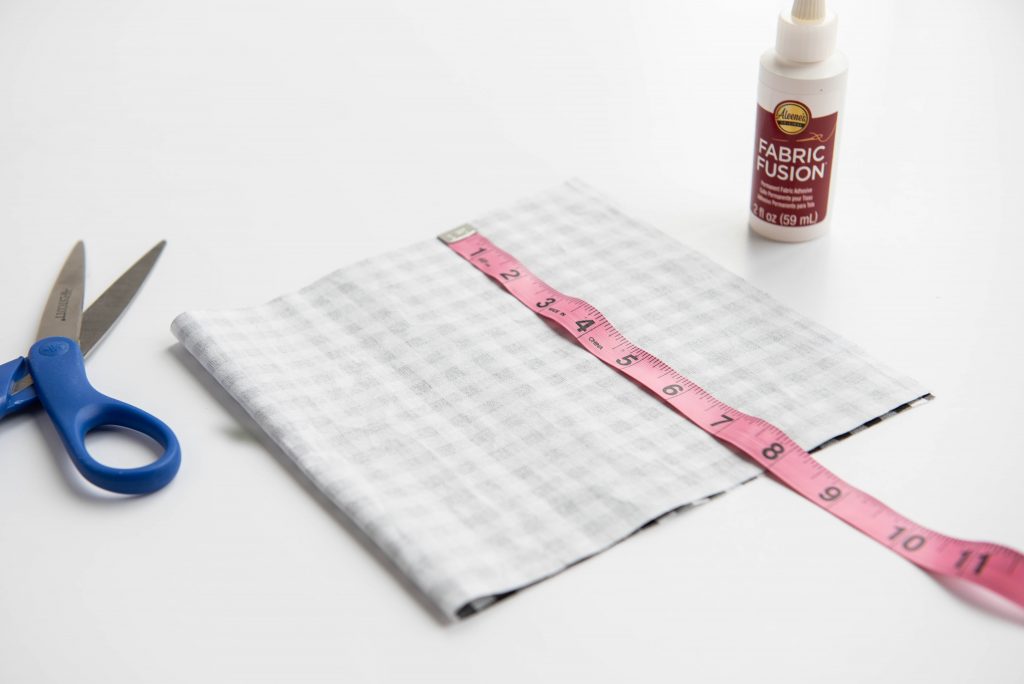
Step 1:
Turn fabric inside out and cut to your desired size. For a medium sized pumpkin, 7.5” x 8” is best but use any size you’d like.
NOTE: For your own sizing, the length unfolded should be about double the height (ex. 8” unfolded is 16” by 7.5”).
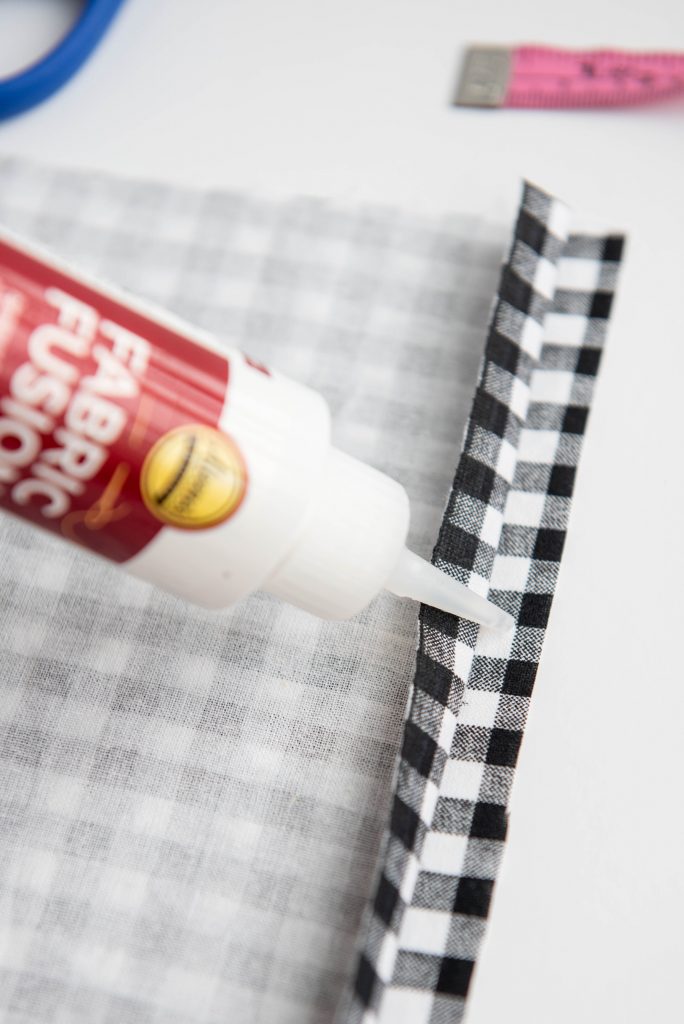
Step 2:
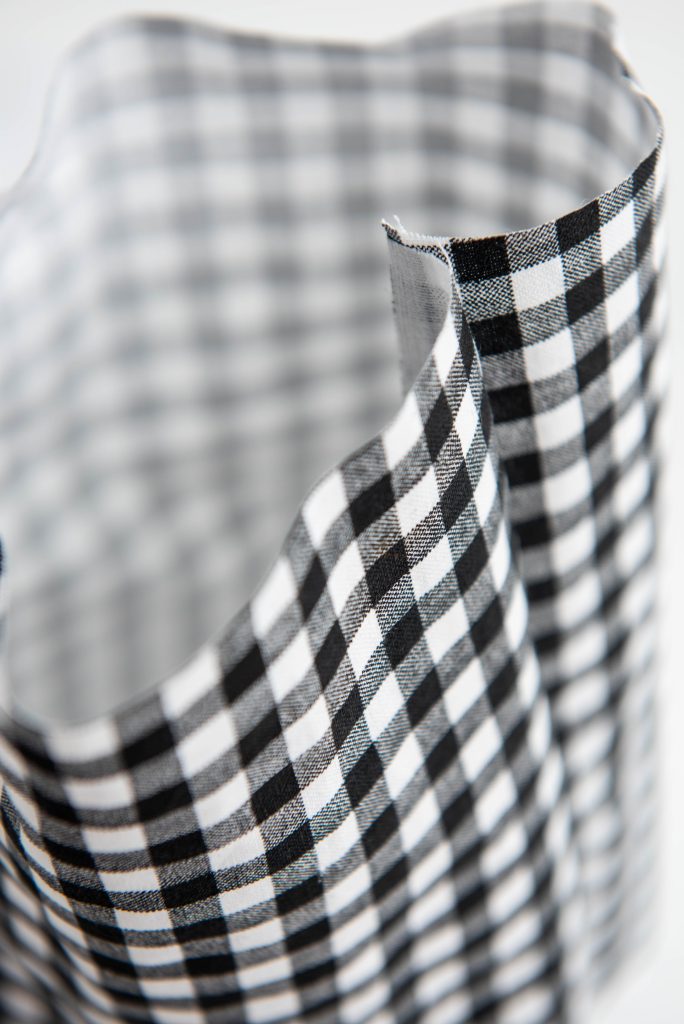
Leaving the fabric inside out use fabric fusion ( or hot glue) about 1/4 inch in for the raw edge to create a faux hem. Set aside to dry completely according to bottle. This will create a small sleeve of fabric leaving the raw edge inside.
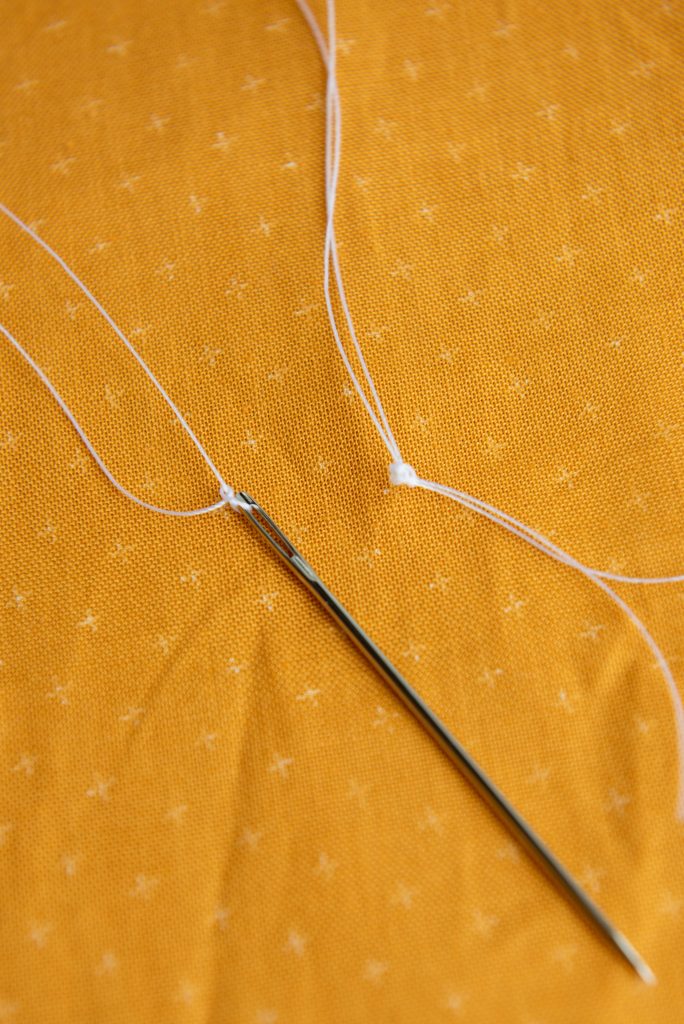
Step 3:
Once dry, double thread a hand sewing needle about an arms length of thread. Knot the ends of the thread to be the size of the needle or bigger to avoid seems from popping later on.
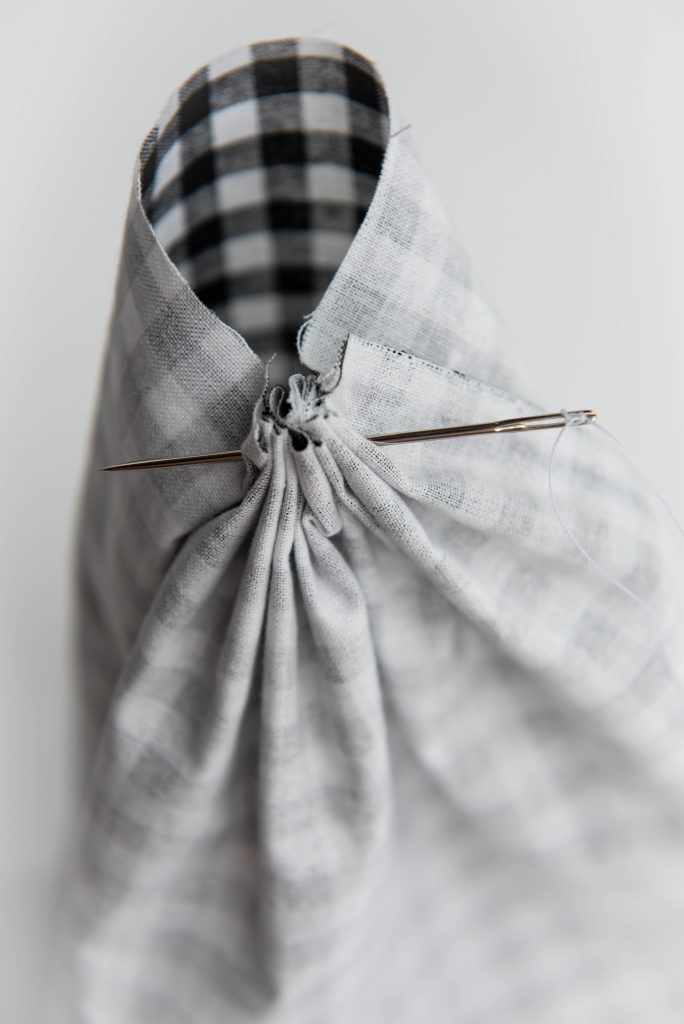
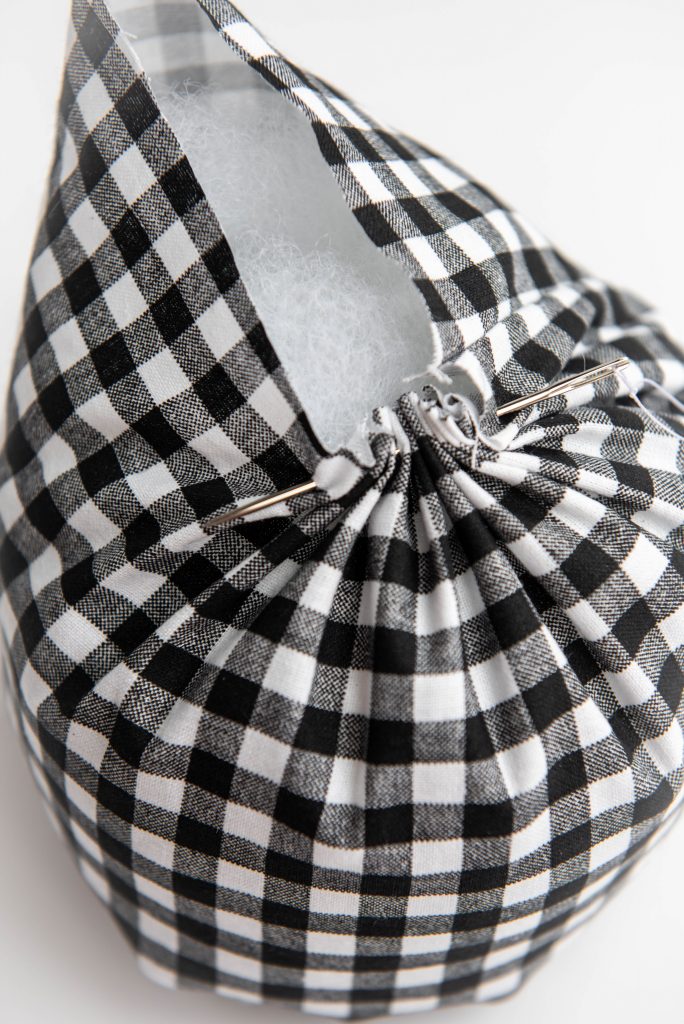
Step 4:
Starting at the left of the faux hem being to weave the needle and thread completely around the diameter of the fabric approximately 1/4 inch from the raw edge. Once at the other side of the faux hem, pull the thread tightly and tie to secure.
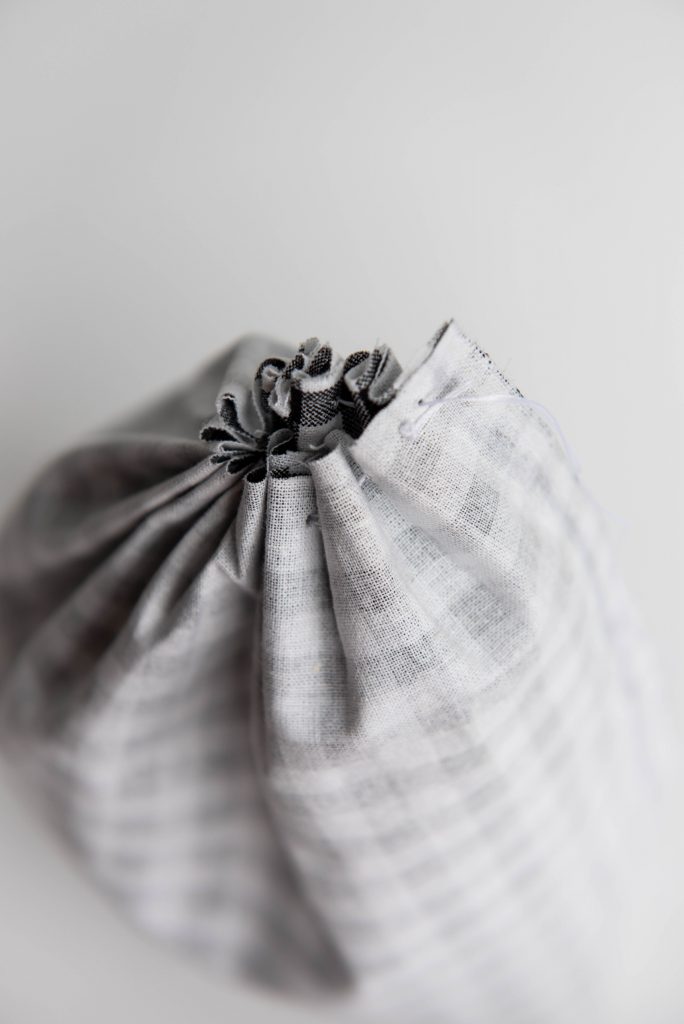
Step 5:
Now, take the thread leaving a small tail and gathering the ruched fabric and tightly wrap thread around the fabric creating a small stem. Tie off the thread.
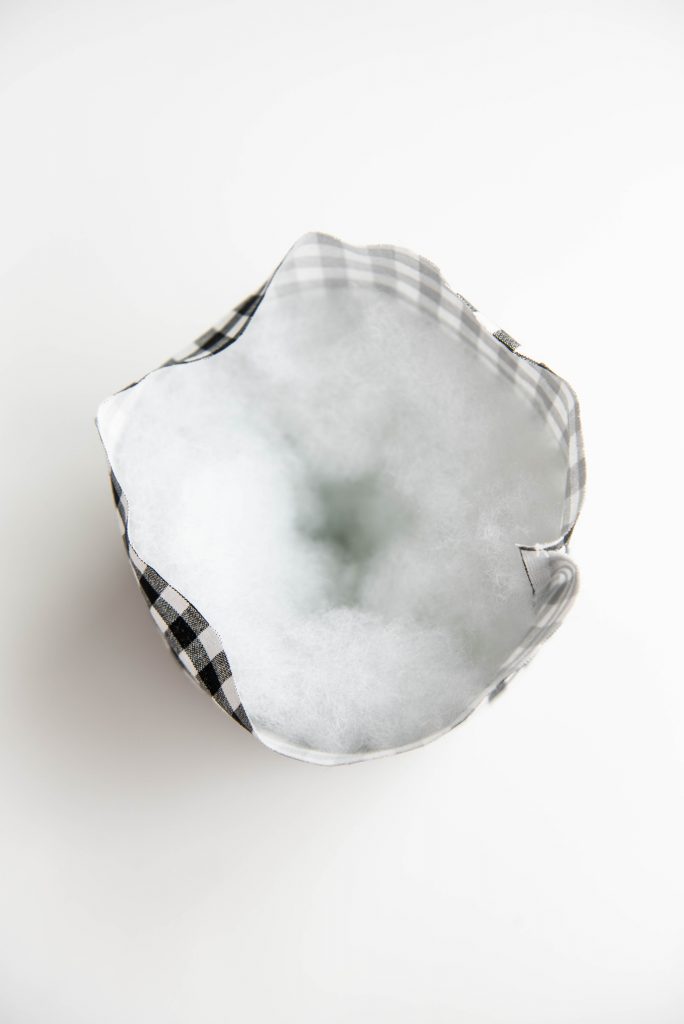
Step 6:
Using poly fill stuff the pumpkin packing the sides and leaving the middle as open as possible. This will help with the pleats later on.
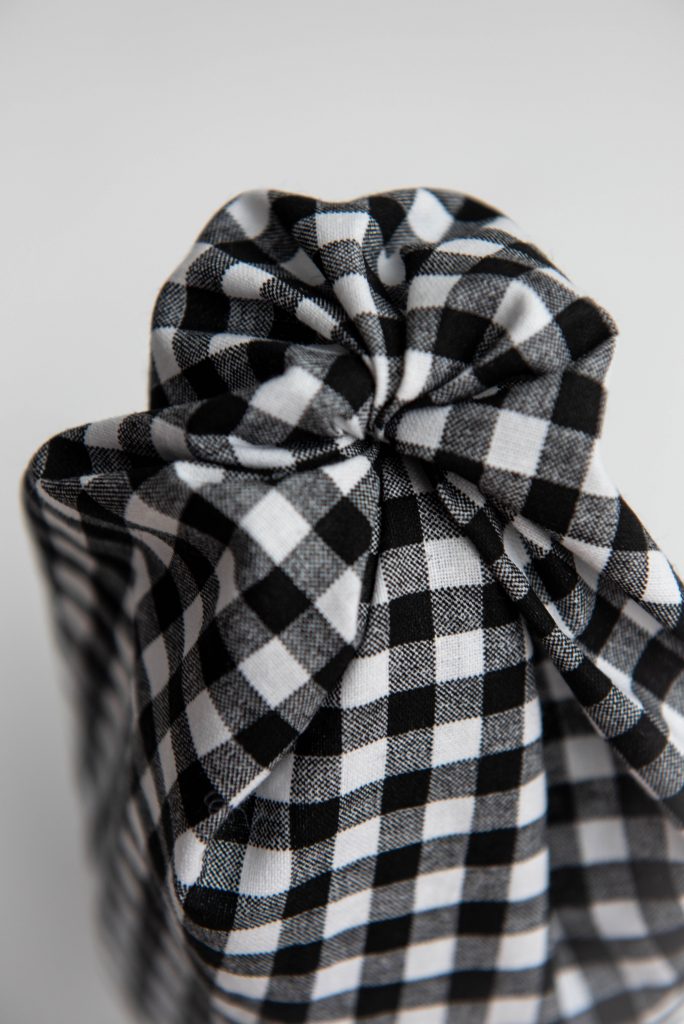
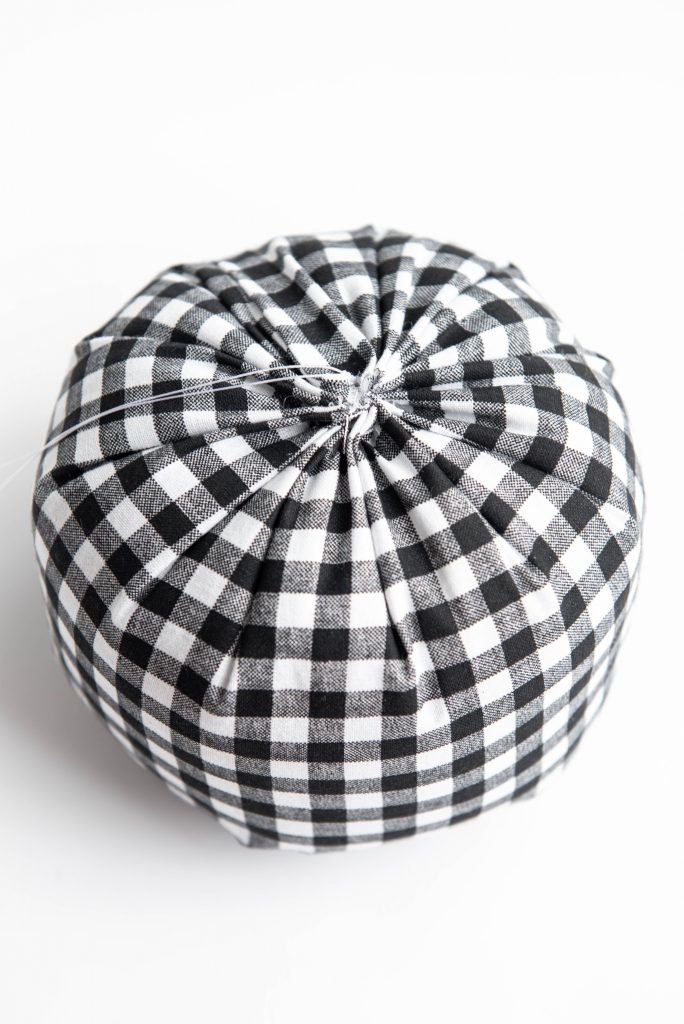
Step 7:
Repeat step 4 to ruche and enclose the top of the pumpkin. However, do not tie off until you add more poly fill and pumpkin feels plump and full. Once filled enough, pull tightly and tie off to knot and trim threads.
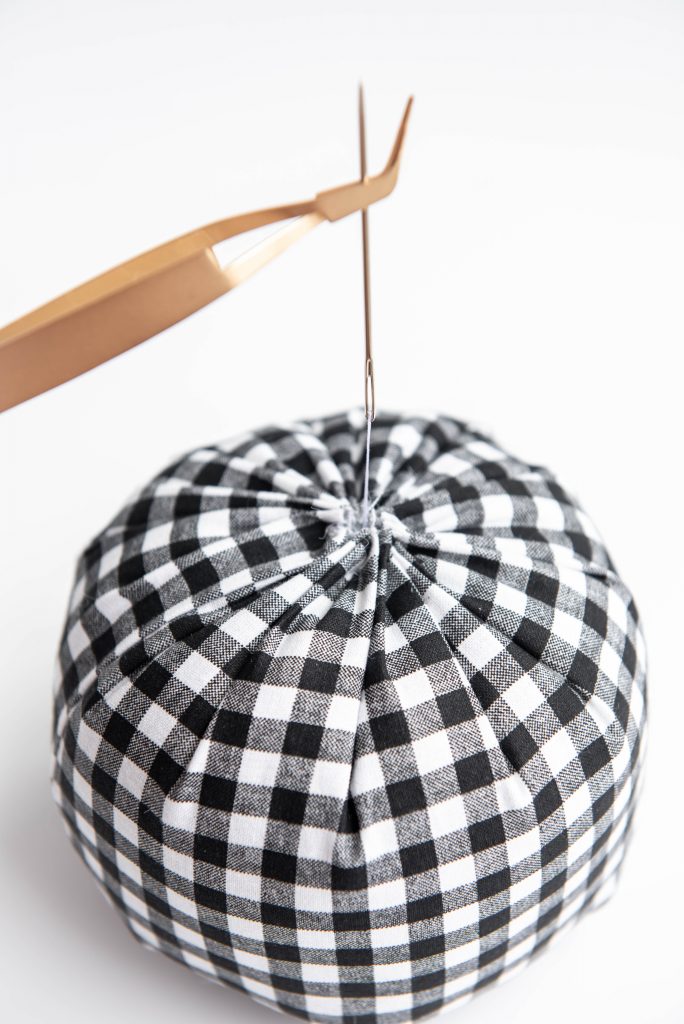
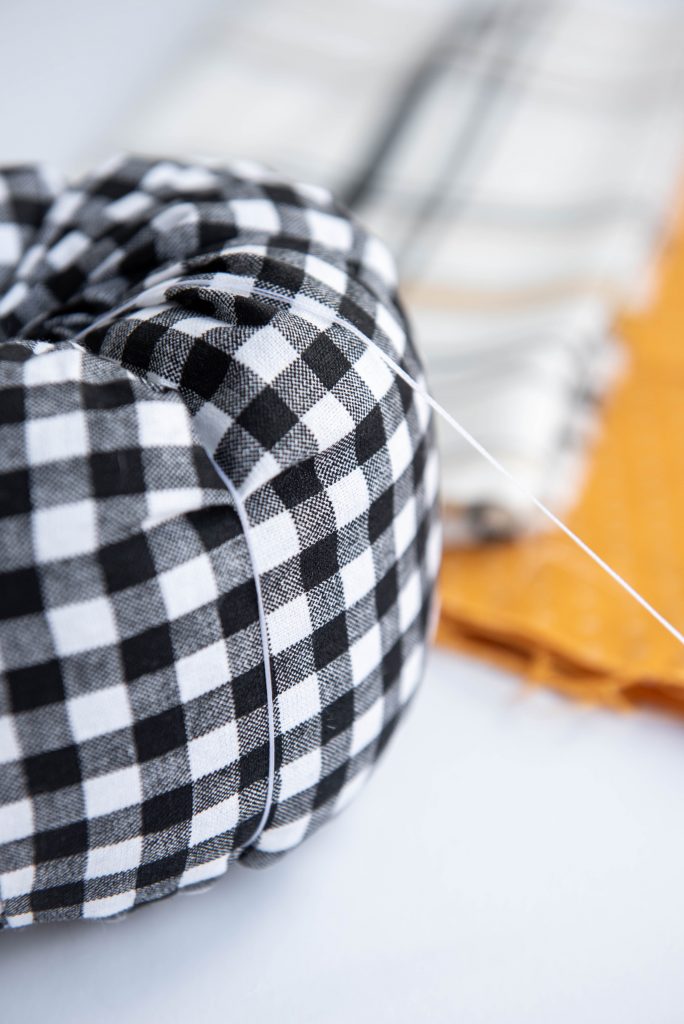
Step 8:
Double thread the needle once more. Create the pleats by threading the needle through the bottom of the pumpkin and up through the top. Pull the thread over the side of the pumpkin, pulling it tight and down to the bottom to repeat for another 4 pleats. Alternate the sides of each pleat.
NOTE: Be sure to keep thread tightly pulled while continuing to thread it from bottom to top and over. Not pulling the thread tightly will result in loose thread without the pleating effect.
Step 9:
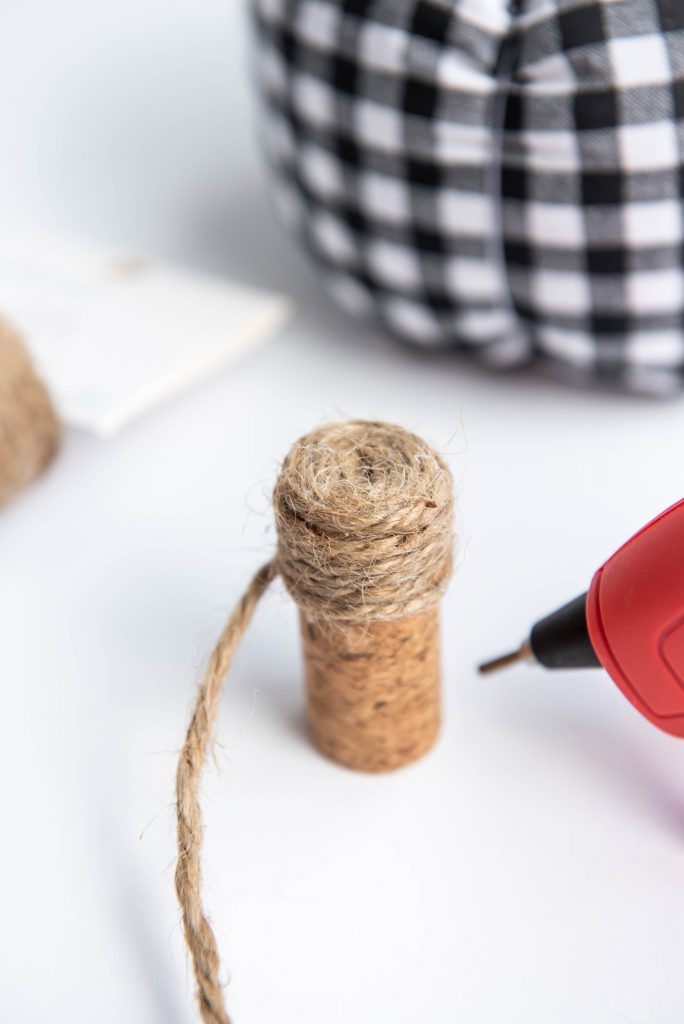
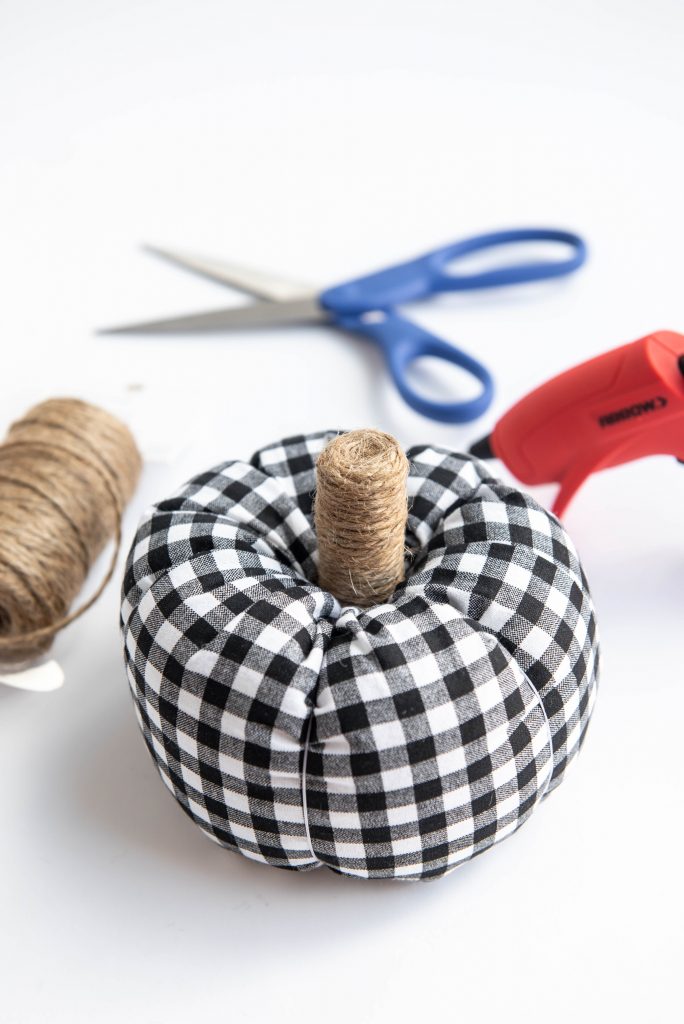
Wrap twine around the cork stem and hot glue until completely covered. Add a heap of hot glue to the bottom and place at the top of the pumpkin.
Step 10:
Add a twine ribbon or fabric ribbon to give it something extra!

Leave a Reply