This is a sponsored post written by me on behalf of Cricut. All opinions are 100% mine.
For years, I wanted a Cricut machine. I didn’t know much about them, including which machine would be right for me, but I saw people making amazing things and I wanted to make them too. Of course, I was guilty of putting everyone else’s needs before my own- and I put off buying a Cricut machine.
Luckily, earlier this year I had the opportunity to become a Cricut ambassador and with that, I received a Cricut Explore Air 2 so that I could actually create the crafts I had been wanting to make and share for years. I quickly got the hang of the machine and my main- and immediate- takeaway was that I should have gotten it YEARS AGO!
If you’ve been on the fence about getting a Cricut, I am here to tell you what I wish I would have known years ago. If I would have realized all of this back then, I wouldn’t have hesitated. Especially because my Cricut turned out to not be “just for me”- it has actually helped my entire family!
1. It’s so much easier to use than it seems. Navigating new software is always a bit intimidating to me, but the Cricut Design Space is SO easy to use. Most of the images and fonts you’ll ever need are already included, especially if you have the Cricut Access membership {which is super affordable}. And the interface is very user-friendly for even a brand new beginner.
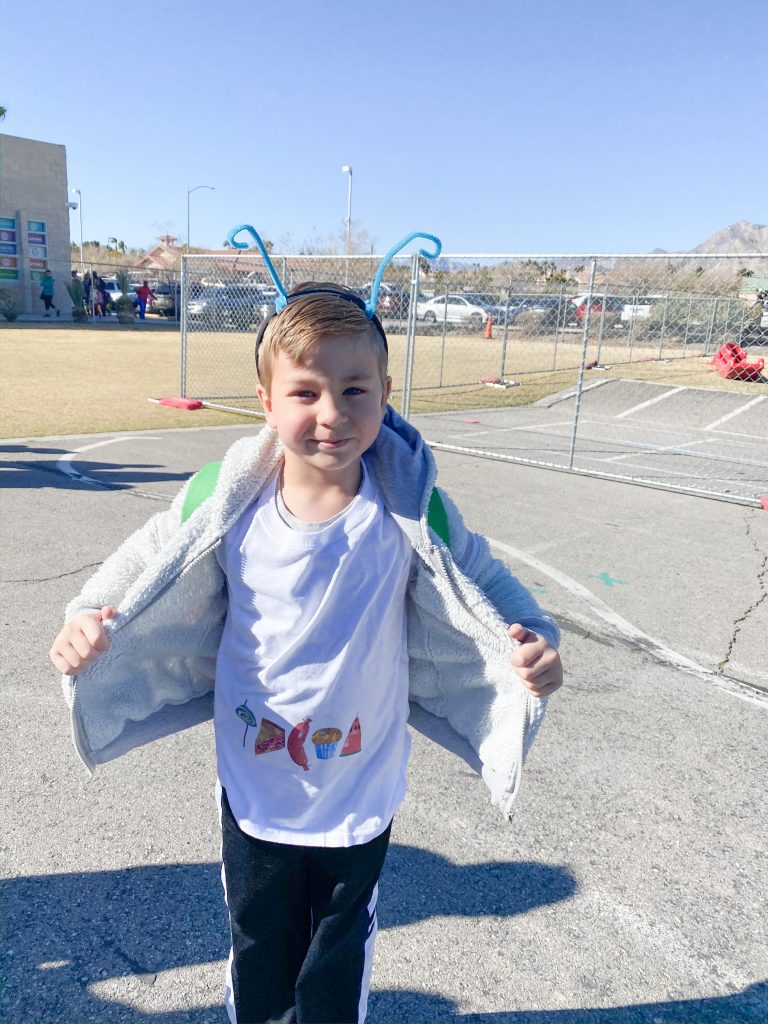
2. It’s perfect for those last-minute school projects. In the two short months that my kids were actually in school this year, my Cricut actually came to the rescue for quick school projects on multiple occasions! One of my favorites was when I made Zac a cute costume for Reading Week to honor his favorite book, The Very Hungry Caterpillar. I made it the night before in about 20 minutes using my Cricut Explore Air 2 and my Cricut EasyPress 2 and some supplies from around the house.
3. The materials are super affordable. I have always gravitated toward the Cricut supplies aisle of the craft store, even before I had a Cricut machine to use the supplies with. All the colors of vinyl and all the cute patterns have always gotten my creative juices flowing. Each pack of vinyl is really affordable, and it always goes a LONG way. You can almost always get multiple uses out of one sheet of vinyl, too! {Depending on the size of your project, of course.}
4. The Cricut Explore Air 2 is helping me organize my entire house. Whether I’m whipping up labels for drawers, jars, or folders, I can easily make my own adorable labels. I can customize them to fit anywhere, change the font to fit different uses, and create a system that helps keep my whole house- and my whole family- organized.
5. Cricut machines work with so many different materials! I always knew that you could make vinyl decals using Cricut machines, but I had NO idea that you could also use the machine to cut cardstock, iron-on, fabric, and cork! You can even insert pens to make designs with ink! The Cricut Explore Air 2 works with over 100 different materials.
As you can see, my Cricut has really come in handy a lot this year. There are so many things that it’s given me the freedom to create!
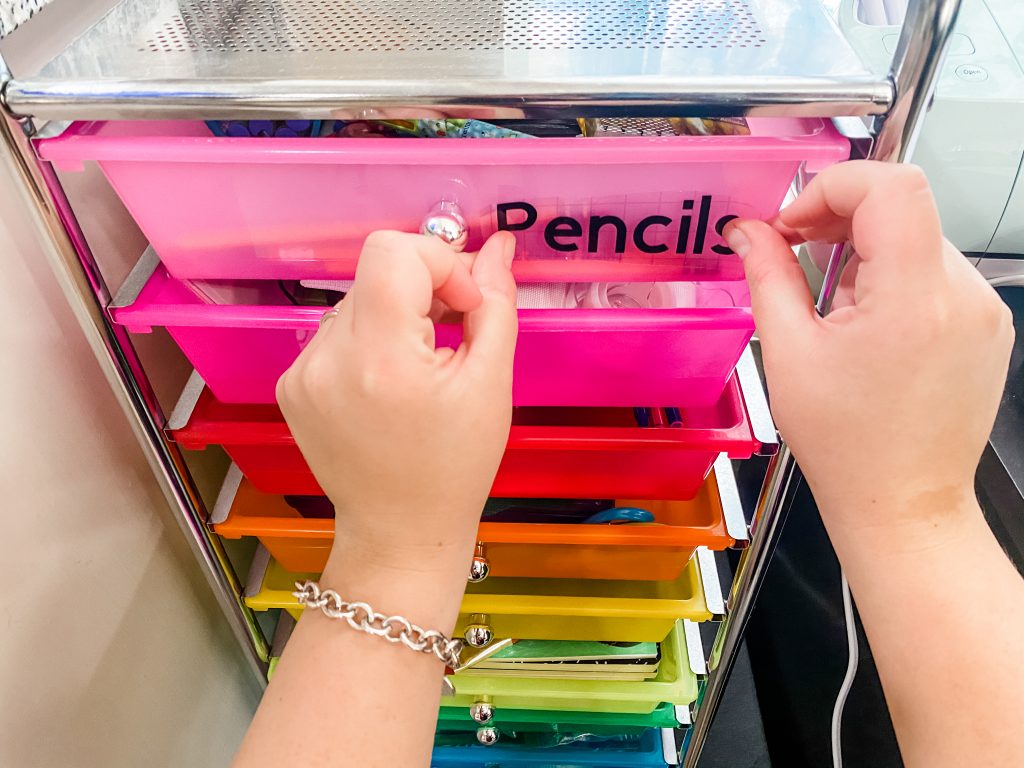
My Cricut Explore Air 2 has been really helpful for organizing the house, and that was true with back to school time too. When we started emergency distance education in the spring, I bought a cart of drawers to house all the school supplies we needed every day. When I realized that we were going to be continuing distance ed, I knew it was time to make sure that cart was FULLY organized- and of course, that includes labels!
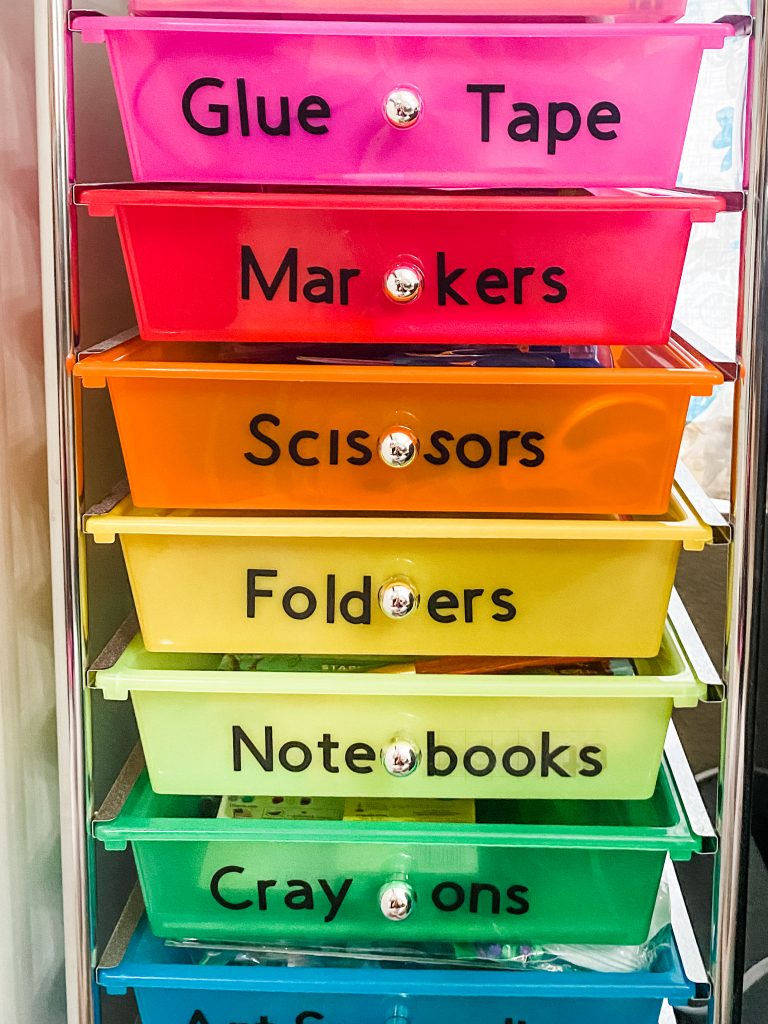
I made a set of labels that covered everything in our supply cart using my Cricut Explore Air 2, and some permanent vinyl. Now the kids don’t have to keep asking me what drawer something is in or open all 10 of them looking for the scissors- they can just glance at the labels and find what they need right away.
If you’d like to organize your drawers the same way, you can click here to access my template in Design Space and follow the easy directions below to use them:
Supplies Needed:
Cricut Permanent Vinyl
Cricut Explore Air 2 with Fine Point Blade
StandardGrip Mat
Weeder Tool
Transfer Tape
Directions:
Create your design. Use Cricut’s Design Space to create any labels you choose. If you want to use my labels, you can grab them right here.
If you want to make your own and explore the Cricut library, consider getting Cricut Access where you get access to thousands of fonts and images for one low monthly price. Learn more about it here!

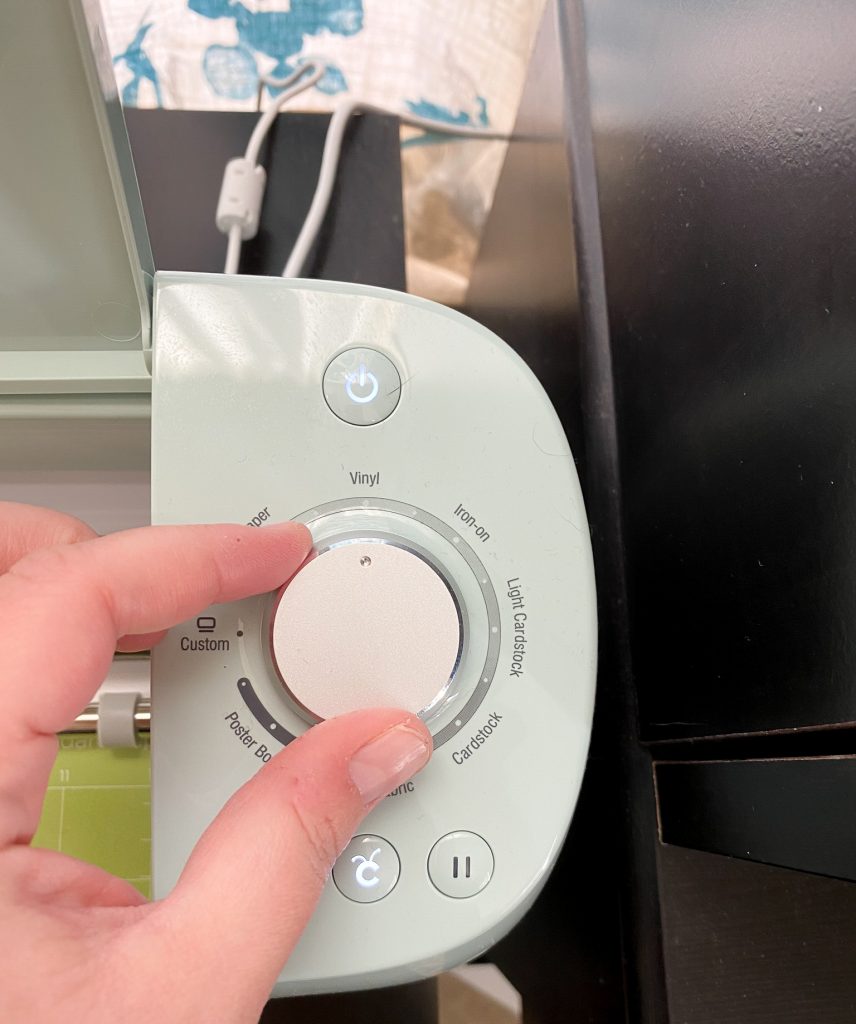
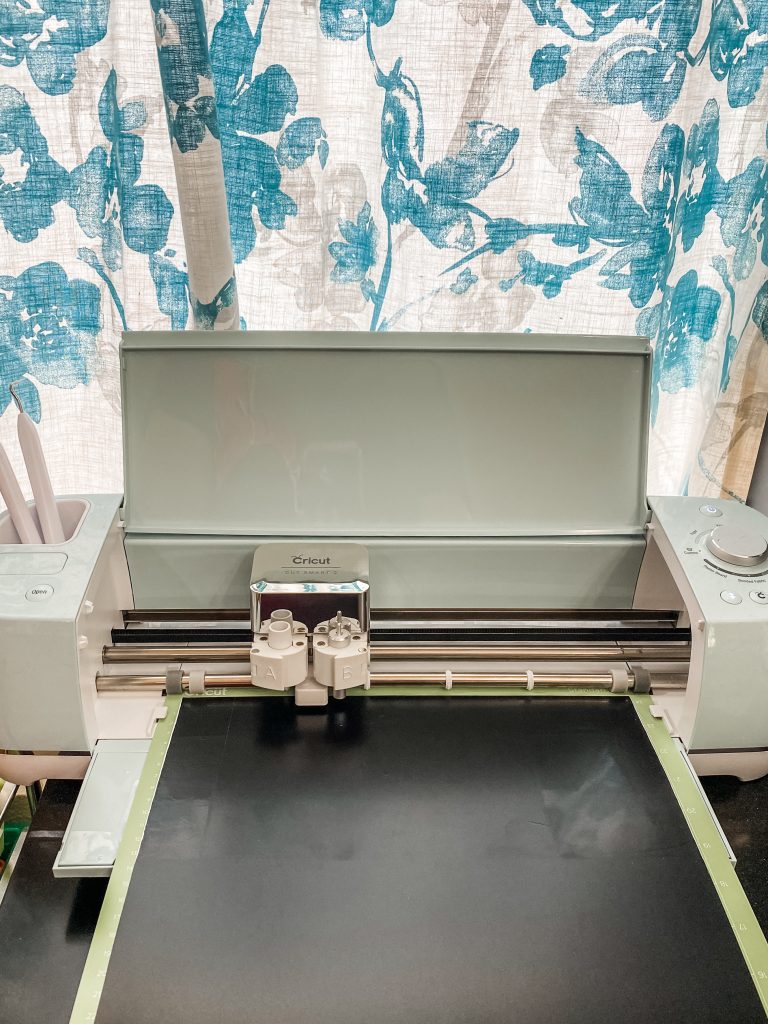
Cut your design. To begin, place your vinyl onto your StandardGrip mat and load it into the machine.
Set your machine’s setting to “Vinyl”. At prompting via Design Space, press the Cricut button to begin the cut.
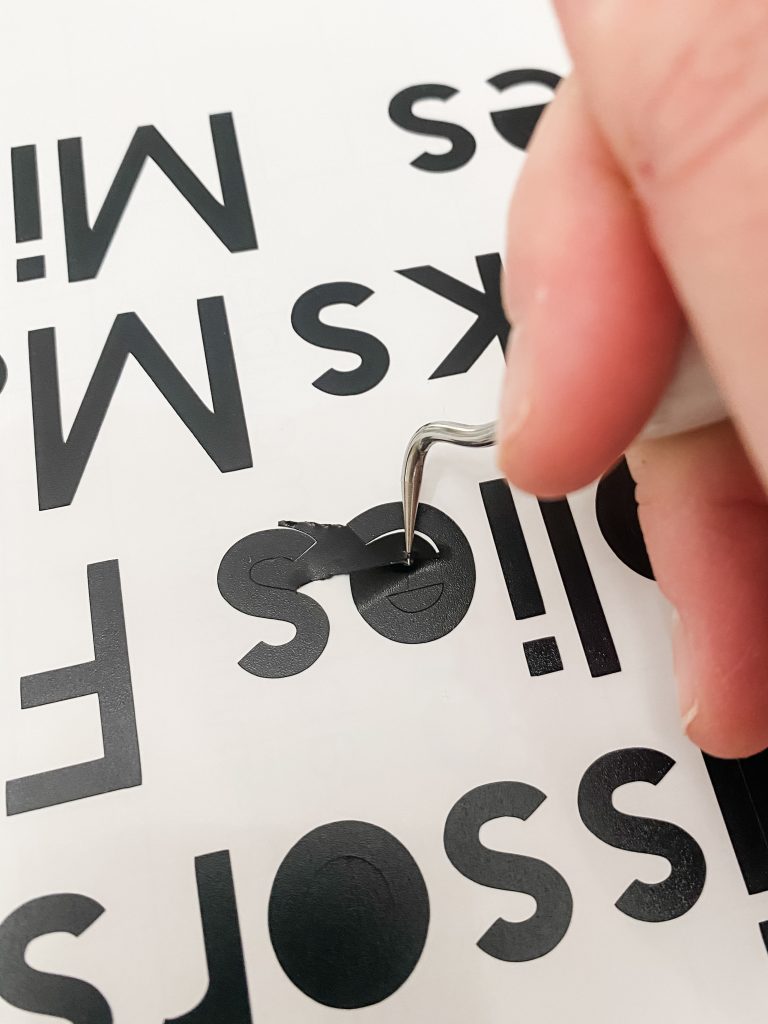
Weed your design. Remove the top layer, peeling carefully around your design. Use your weeder to remove any small details you don’t want to transfer. Make sure you that you fully remove those weeded pieces from your work area so they don’t accidentally end up in a random place on your design!
Apply Transfer Tape. Cut a piece of transfer tape that’s large enough to cover the image. Remove the backing of the transfer tape and cover the vinyl with it.
Apply Vinyl to Surface. Use your scraper to adhere the transfer tape to the vinyl. Gently peel the transfer tape up, making sure that the design is adhered. {If needed, use the scraper again until it’s all attached.}
Place the design on the drawer where you want it. Use your scraper again to adhere the vinyl to the cup, then gently peel away the transfer tape. Make sure that the design doesn’t come up with the tape.
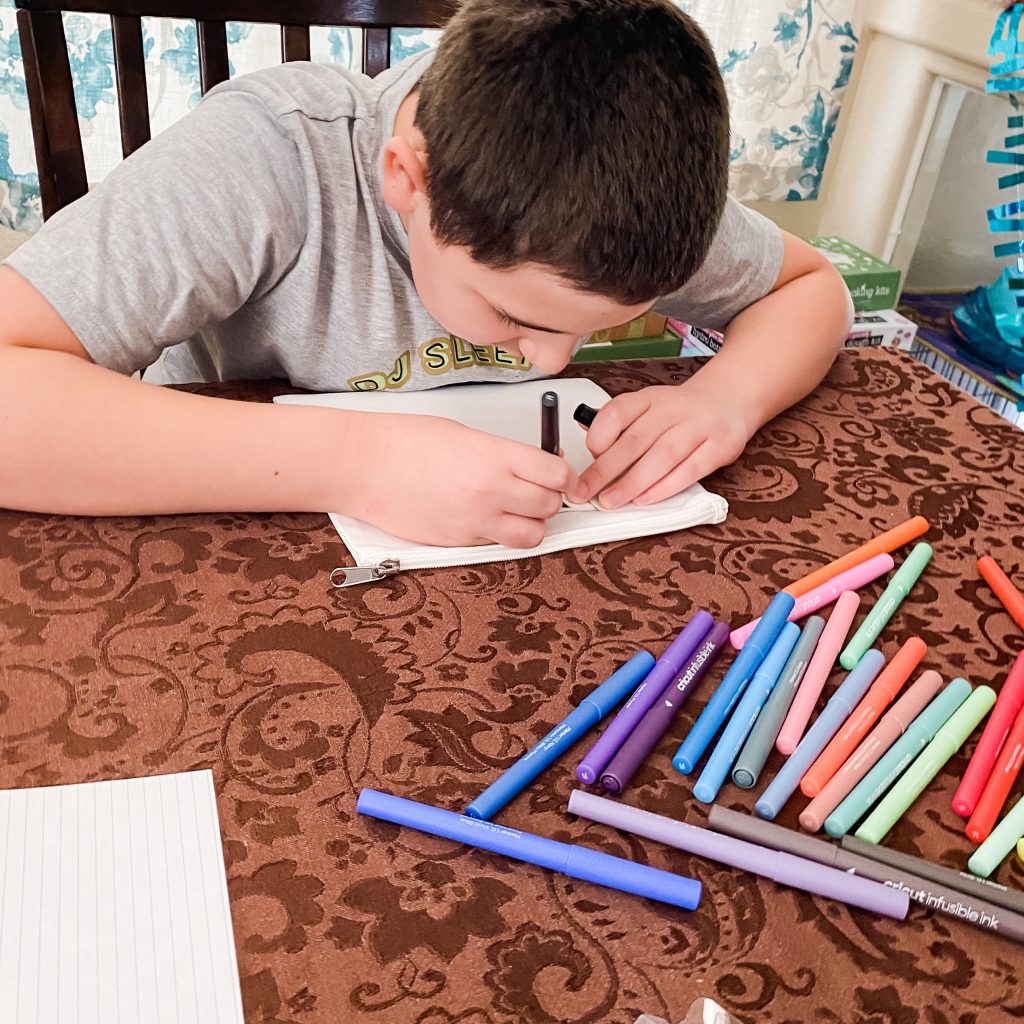
While most of our school supplies are in our big drawer cart, the kids needed somewhere to put the supplies they need during class, like pencils, crayons, and scissors. Cricut came in handy for that as well when my kids made their own pencil cases! I didn’t need my Cricut Explore Air 2 for this one, but I did use the Cricut EasyPress and the Infusible Ink Markers and Infusible Ink Cosmetic Bag Blanks.

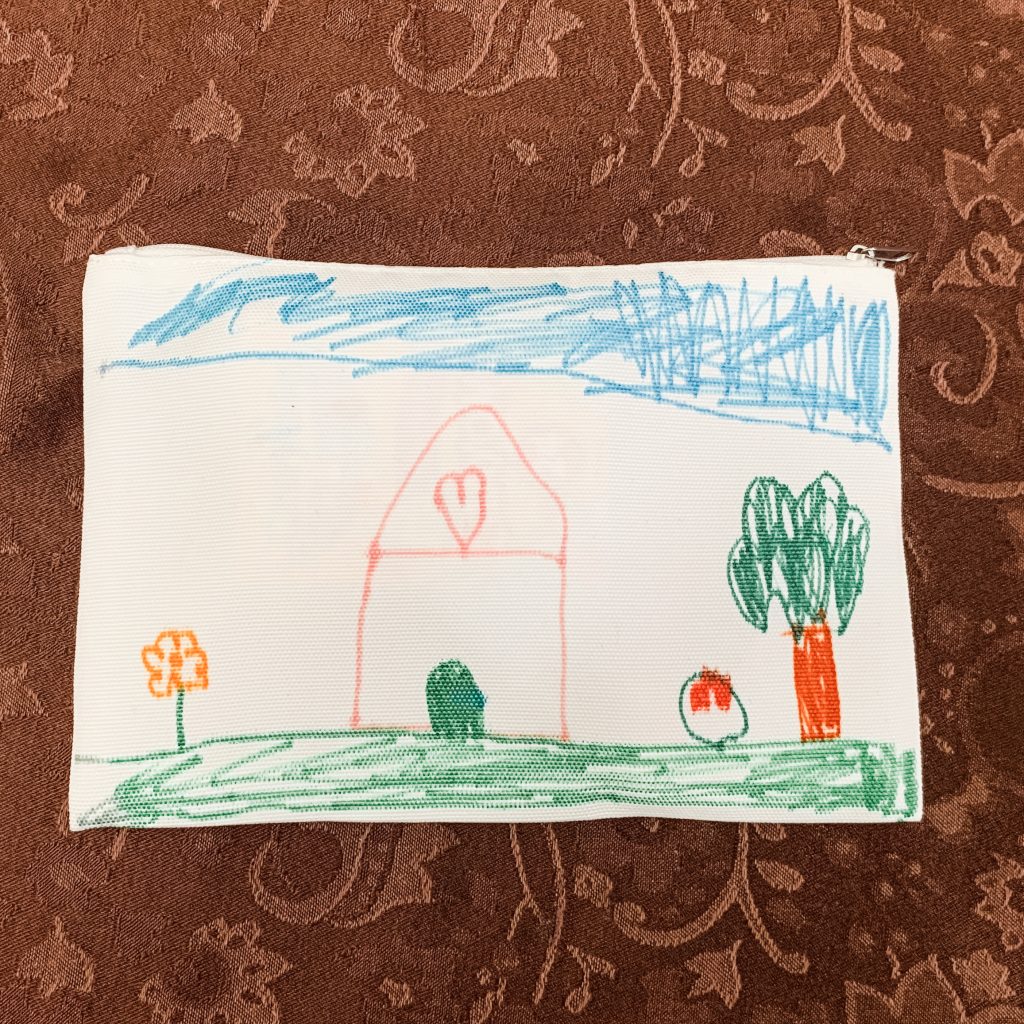
I put our big pack of Infusible Ink Markers on the table, gave each kid a large Infusible Ink Cosmetic Bag Blank, and let each kid go totally crazy creating whatever design they wanted on their bags. Then I pulled out my trusty Cricut EasyPress and brought them to life! In just 60 seconds, the ink fused with the bags and became a permanent addition. Using the heat also made the design much brighter- perfect for Zac’s rainbow bag! The kids were really excited to fill their pencil cases up with the supplies that they need at their desks during the virtual school day.
Whether you are a huge fan of crafting and you want to bring your products to the next level or you just want to make fun stuff with your kids, Cricut can help you do just that!

Leave a Reply